How to set Reverse DNS / rDNS for your server IP
Set a reverse DNS PTR record for an UnderHost VPS or dedicated server IP from CustomerPanel. Includes hostname requirements, screenshots, verification commands, and support ticket details.
 UnderHost NOC
Network Operations
UnderHost NOC
Network Operations
On this page
Reverse DNS, also called rDNS or a PTR record, maps an IP address back to a hostname. It is commonly used for mail server reputation, SMTP checks, server identification, and abuse validation.
For example:
IP address:        192.0.2.10
rDNS / PTR name: server.yourdomain.comCustom rDNS is normally available for IP addresses assigned to your active Cloud VPS or dedicated server. Shared hosting uses a shared server IP, so the PTR record is managed by UnderHost at the server level.
Before you start
Before submitting an rDNS update, make sure the hostname you want to use already resolves to the same IP address.
If you want this reverse DNS:
192.0.2.10 -> server.yourdomain.com
Then this forward DNS record must already exist:
server.yourdomain.com A 192.0.2.10
If the hostname does not resolve to the correct IP, the rDNS update may be skipped or rejected by the network.
How to set rDNS from CustomerPanel
-
Log in to CustomerPanel
Go to the UnderHost CustomerPanel and log in:
-
Open your services
From the top menu, go to Services > My Services.
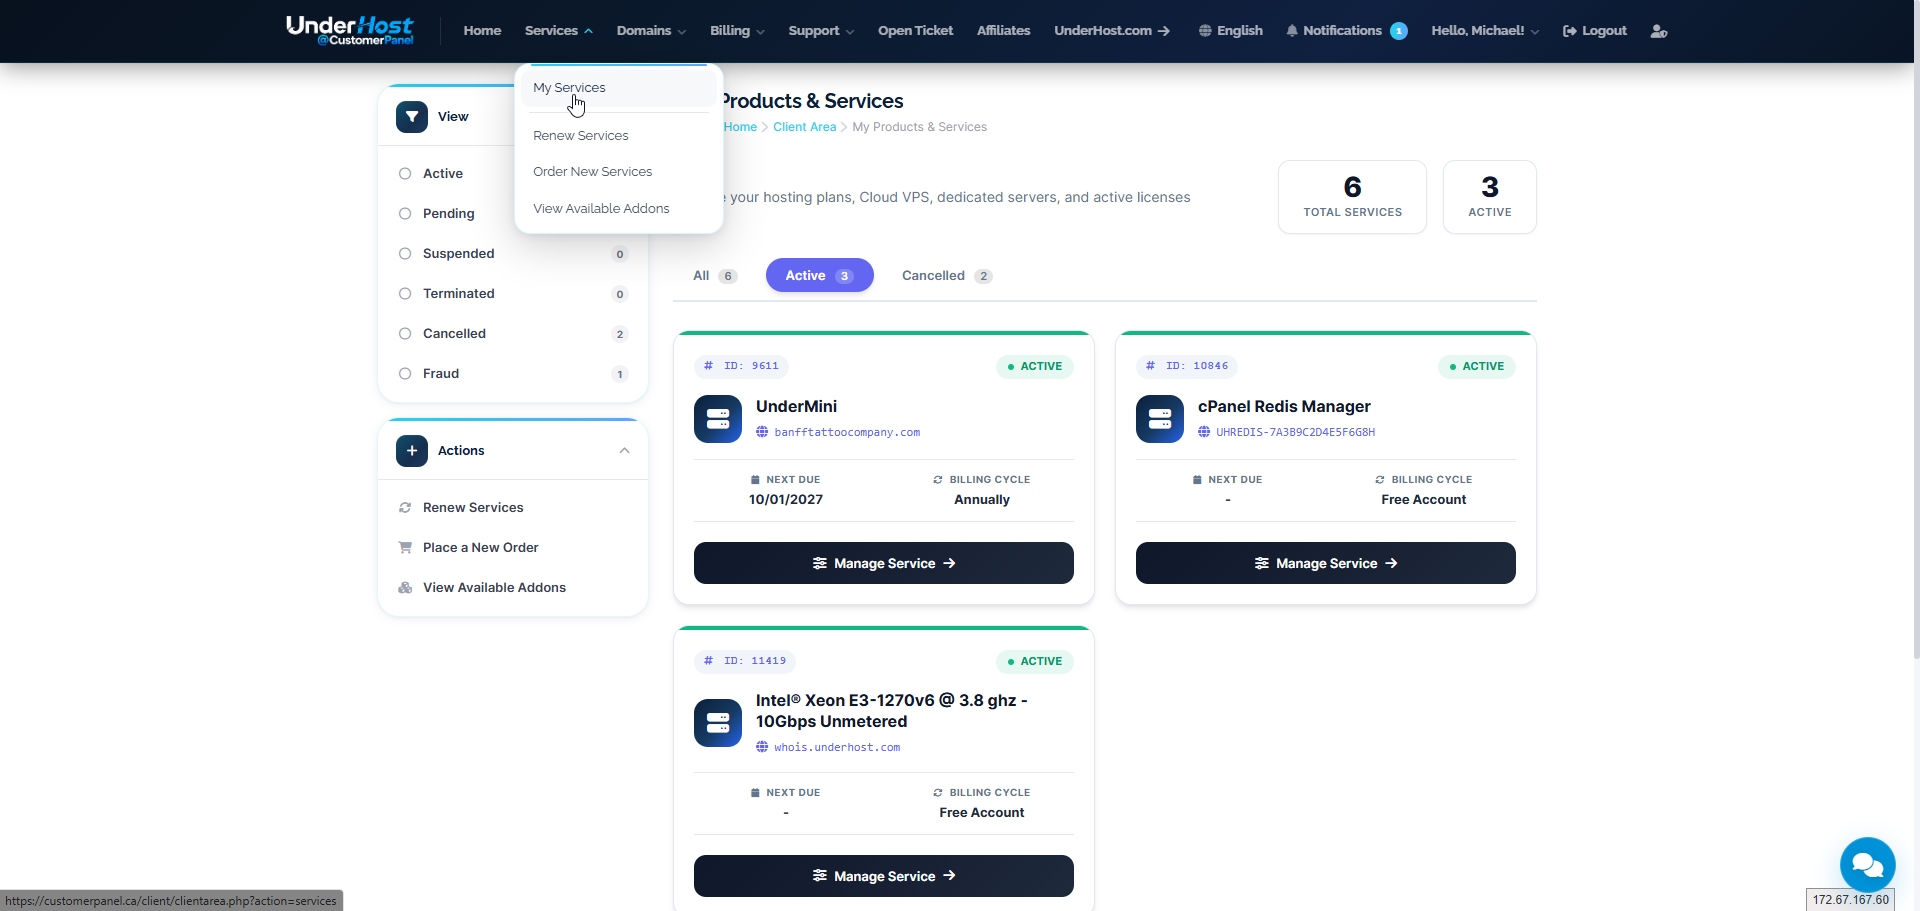
Open Services > My Services in CustomerPanel. -
Select the server
Click Manage Service on the VPS or dedicated server where you want to update rDNS.
-
Open the rDNS tool
Inside the service page, click rDNS. It is under the Server Management section.
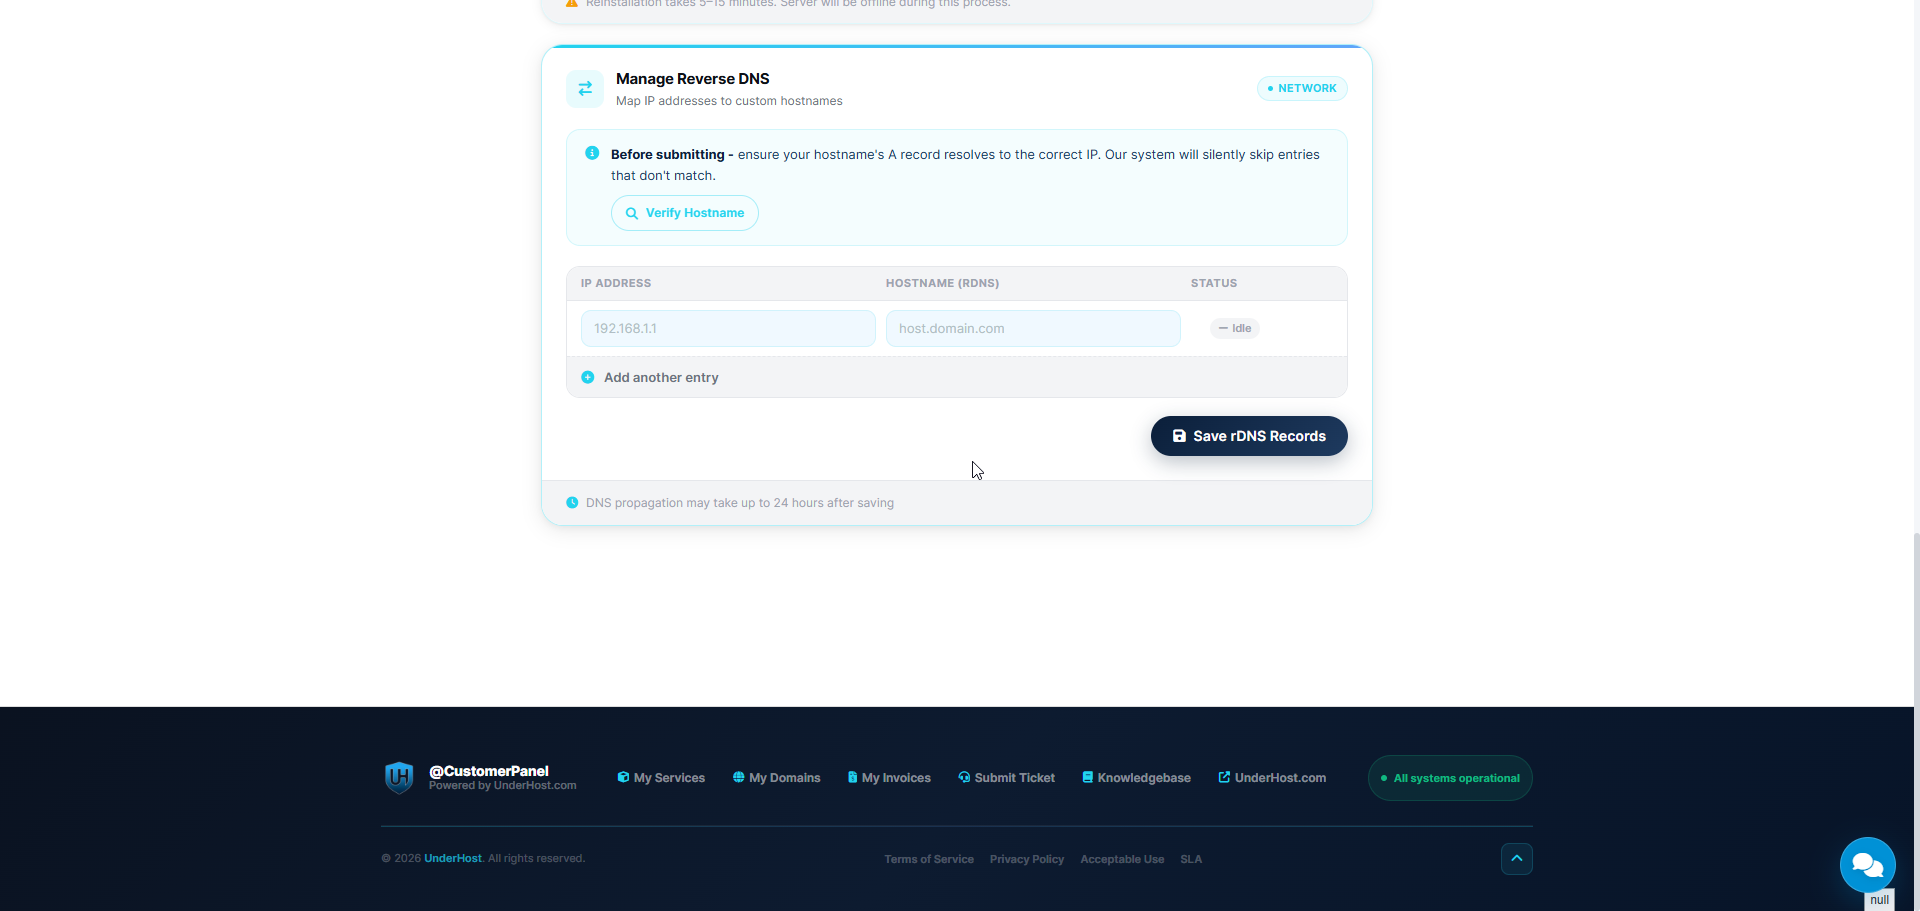
Open the rDNS tool from the server management area. -
Enter the IP address and hostname
In the rDNS form, enter the IP address assigned to your service and the hostname you want the IP to resolve to.
form exampleIP Address: 192.0.2.10 Hostname: server.yourdomain.comClick Save rDNS Records when you are ready.
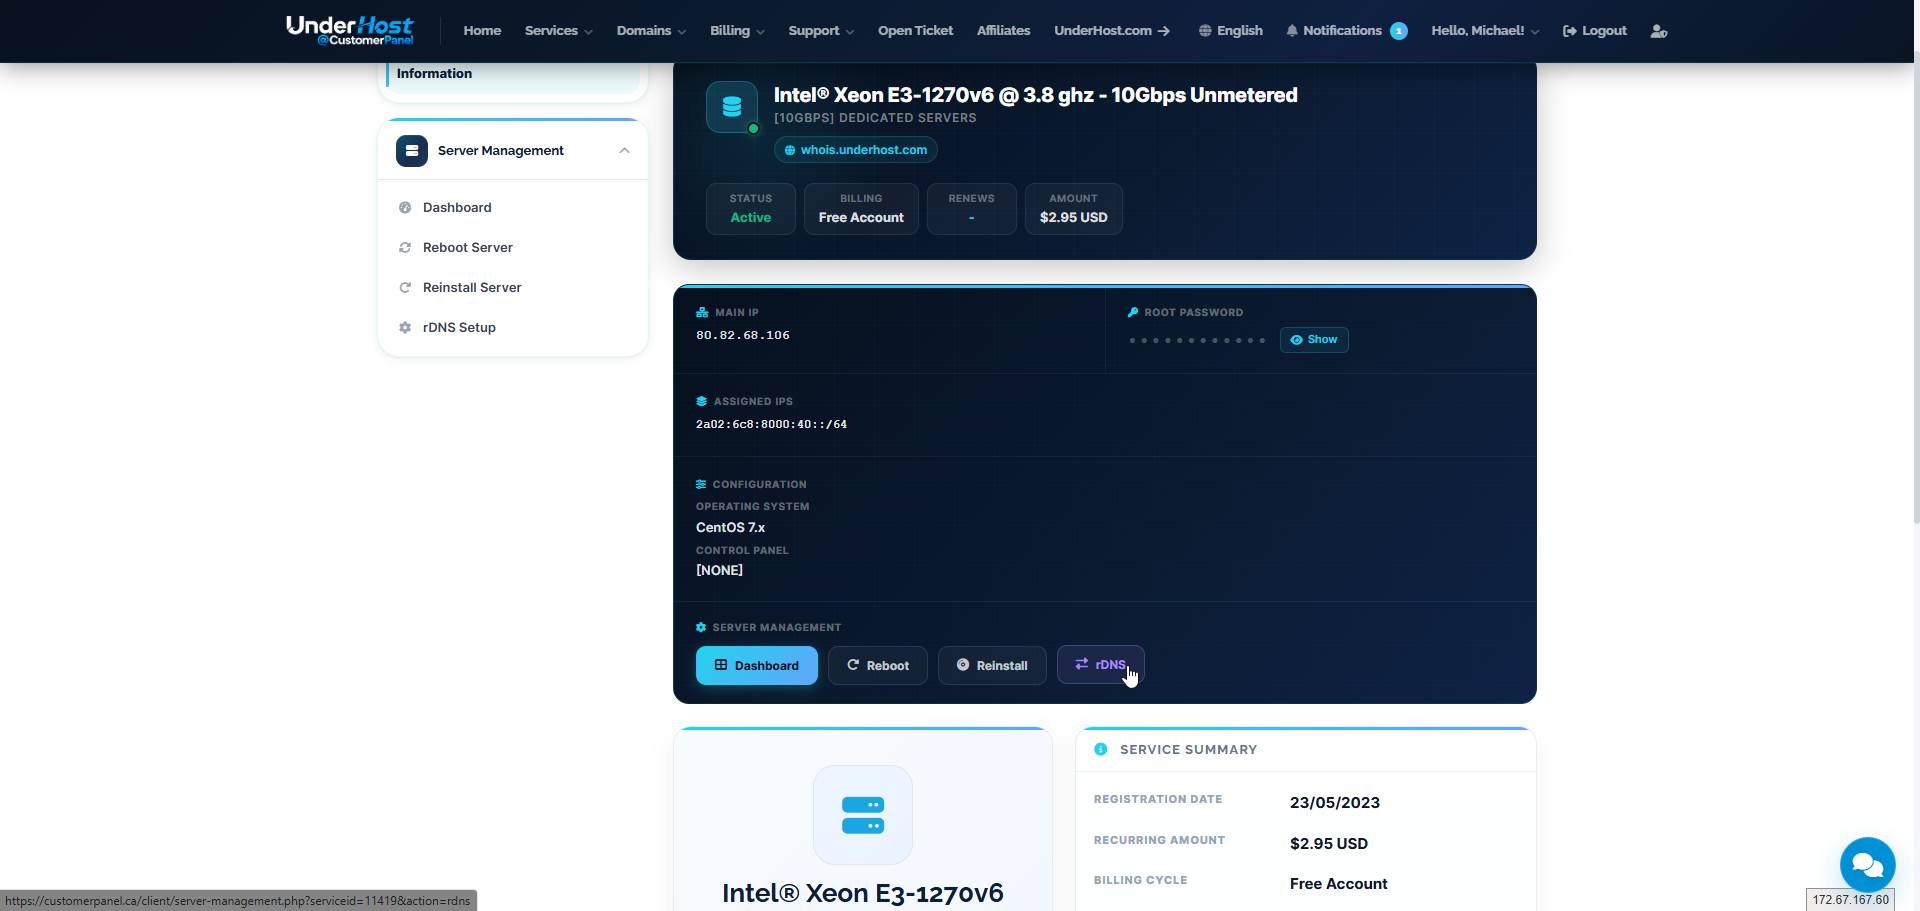
Enter the IP and matching hostname, then save the rDNS record.
Important notes
- The hostname must have a valid A record pointing to the same IP before you submit the rDNS request.
- rDNS propagation may take up to 24 hours.
- Some upstream networks may require manual approval before the PTR record is applied.
- rDNS can only be set for IP addresses assigned to your active service.
- Suspended, terminated, or unassigned IP addresses cannot be modified.
- IPv6 rDNS availability may depend on the service location and upstream provider.
How to verify rDNS
You can verify rDNS from your computer or server using dig or host.
dig -x 192.0.2.10 +short
host 192.0.2.10
Expected result:
server.yourdomain.com
You should also confirm the forward DNS resolves back to the same IP:
dig server.yourdomain.com A +short
Expected result:
192.0.2.10
Need help?
If the rDNS tool does not update your hostname, open a support ticket from CustomerPanel and include:
- Service hostname or service ID
- IP address
- Requested rDNS hostname
- Confirmation that the hostname A record already points to the IP
Our team will review it for you. If the issue is upstream approval or a location-specific limitation, support will let you know what can be changed.
Related: How to manage your Cloud VPS | Getting started with your dedicated server | Dedicated IP addresses for VPS and servers | Why is my email going to spam? | CustomerPanel server management tools
Need staff to review an rDNS request?
If the rDNS tool does not accept the hostname or the update does not apply, open a support ticket with the service ID, IP address, requested hostname, and A record confirmation.